
You will also need both a great set of headphones or monitors. This is because that you can’t tune in to and modify voice-over with computer speakers; you need to listen to exactly how it was recorded. It’s crucial you receive “studio” gear instead of these designed to play music which exaggerate the peaks and lows. You will get wonderful business headphones for $80-$100 and up. Screens are speakers; get the ones that are pre-configured and have their very own power (“effective” monitors). Today’s screens include quarter-inch wire inputs for the interface and you may get a good collection now for $150.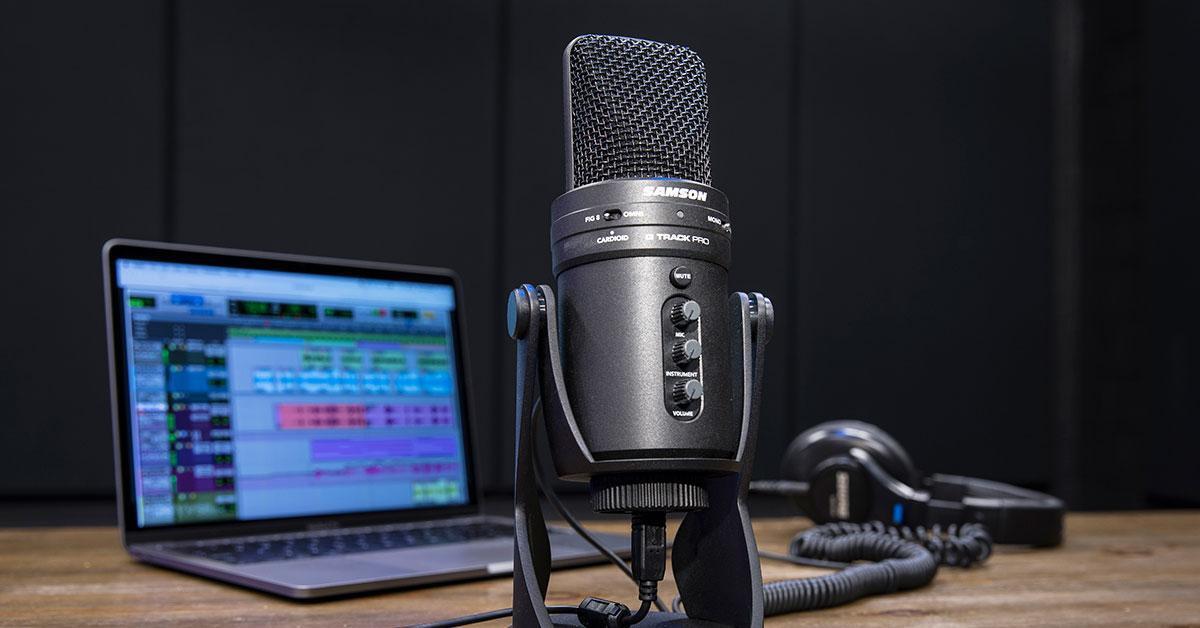
Eventually, the equipment to history on. Laptops are getting stronger and it surely doesn’t subject anymore if you utilize that or perhaps a desktop. I’ve even used little laptop notebooks for recording voice-over and it produced number difference. In addition, it does not subject if you are using a Macintosh or a PC–pros in the market use both. Use everything you know and what you’re relaxed with.
So there’s your simple setup: a $200 microphone to a $150 interface to a pc working free application, plus little such things as the pop-filter ($15-$20) and maybe a supplementary wire or two ($10-$15), and your $99 headphones or $150 monitors. The less gear in your string from the mike to the pc, the less potential for noise or anything planning wrong. Please don’t be frustrated by that which you might study out there. Instead of breaking the bank on pricy and extravagant equipment, target as an alternative on your own instruction and want to become greater at the craft and skills of being a voice-artist.
The capacity to use appropriate mike method to bring out the most effective in your style is indicative of a genuine style around professional. Learning and employing appropriate mike strategy is very useful as it pertains to modifying, mixing and making good voice overs. For a speech skill, understanding just how to: avoid plosives, alter for makeup, and “perform” the mike such that it will boost the feeling of the delivery are crucial skills. Expertly applying these skills helps a recorded style monitor fit into a combination nearly effortlessly.
Your area to the microphone, how near or much you’re to it, influences the microphone’s volume response. Your axis to the microphone – how centered or down middle you’re to the diaphragm – affects frequency answer in addition to how properly the microphone reflects your style according to their polar pattern. Normally the character of your supply affect the mike as well.
Note: “Frequency response” identifies the lows and levels in the tone of one’s voice (like bass and treble on a stereo) and “Polar pattern” refers to the space round the microphone’s diaphragm that sees sound. A microphone for style around an average of (although some are adjustable) utilizes a cardioid polar pattern. Imagine an area the size and model of a big pumpkin across the grill of the mike: this is a cardioid pattern. “Makeup” describes how loud or smooth your voice gets while examining a script.
Each microphone, no matter what form you’re using, includes a sweet spot. This is actually the devote area to the noise source where in actuality the mike typically appears their best. In big diaphragm condenser microphones the sweet spot is usually about 6 to 8 inches from the diaphragm. This is frequently wherever your style can noise their most basic in accordance with the power of the professional microphone for voice over to replicate that sound accurately.
When utilizing a large diaphragm condenser, place your self about 6-8 inches far from the mike with the diaphragm slightly off center (left or proper, whatever feels comfortable) and above your mouth. If your voice appears also “nasally” take to going the microphone decrease or higher. Aim the microphone somewhat backwards so your air coming from the mouth and nose doesn’t attack the microphone’s diaphragm immediately, but at an angle. Tilting the direction of the microphone helps you to diffuse the influence of the air which helps to avoid plosives. That original position will continue to work for more popular voice overs such as for instance straight-forward announcer,narration, and promotional reads.